
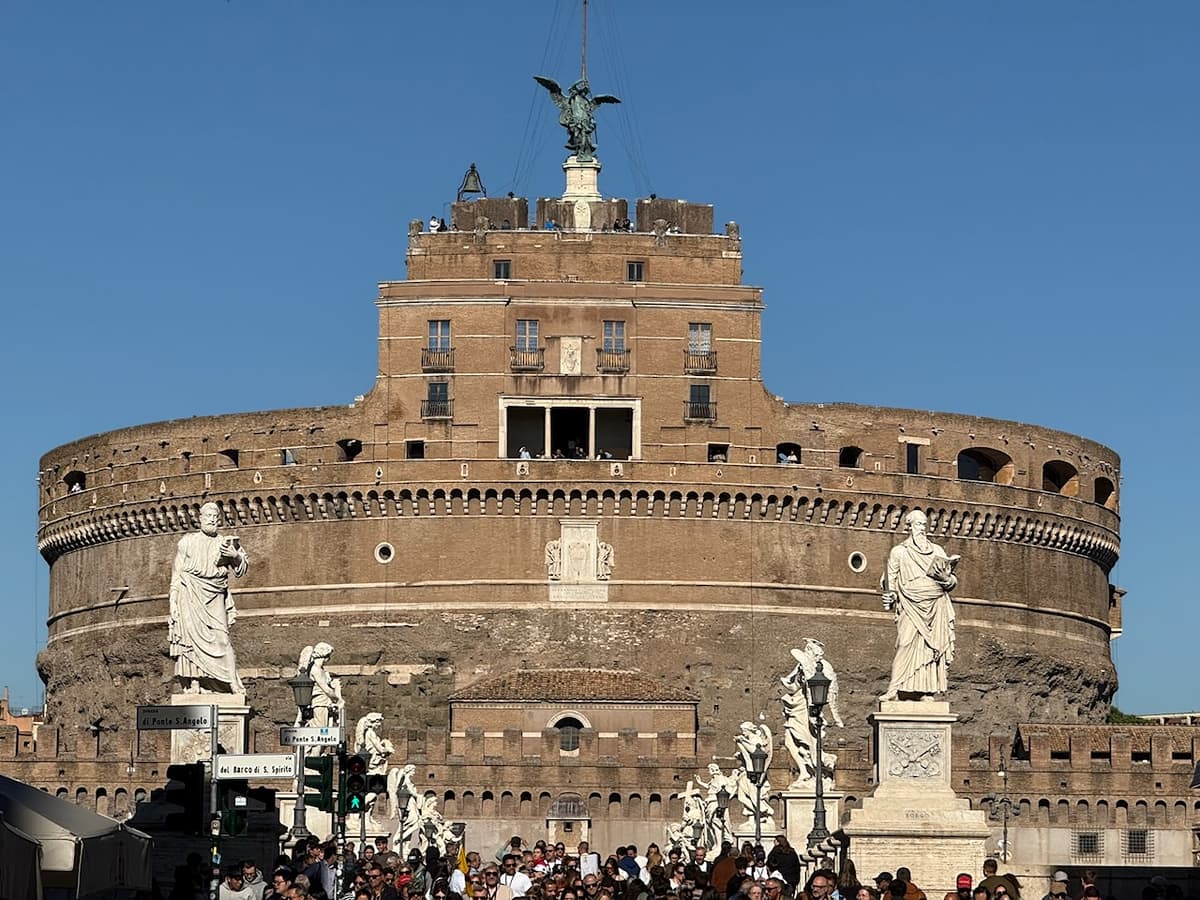
The Castel Sant’ Angelo is one of Rome’s most interesting monuments. Originally the mausoleum of the emperor Hadrian (d. 138 CE), it later became fortress, a papal residence, and then finally a museum.
Its appearance today reflects how it looked in the 16th century, at the height of its use as a fortified papal palace: a solid drum of worn Roman stone, surmounted by the brickwork of the multi-story papal residences, and surrounded by a curtain wall with four bastions at the corners.
In the first couple of centuries after Hadrian’s death, it looked very different. The massive central drum (21 meters tall, and built around a concrete and aggregate core) was faced with white marble (long since plundered). The top rim of the drum featured an entablature with a frieze of bull’s heads linked by garlands (fragments of which still survive), topped with colossal statues 6 meters tall. All of this was enclosed in a “basement” 89 meters on a side and 12 meters tall, faced with white marble, with pilasters and statues groups on the corners.
On top of the central drum was a central tower, probably more than 20 meters tall, which is now enclosed in the central complex of the papal residence (several of the residences’ rooms are built within the tower). Around the tower, we think, was a mound of earth, piled on top of the main drum to support a hanging garden, probably of cypress trees. The tower itself served as a podium supporting a massive bronze sculpture that probably depicted Hadrian in a four-horse chariot (a quadriga).
In this two-part series, we’ll describe what it’s like to explore the monument today. Part I will focus on the major ancient remains and on the first level of the renaissance-era papal residence; Part II will concentrate on the residence’s upper levels. And, of course, be sure to check out our podcast episode on the Castel: The Castel Sant’Angelo: From Hadrian’s Ancient Rome until Today.
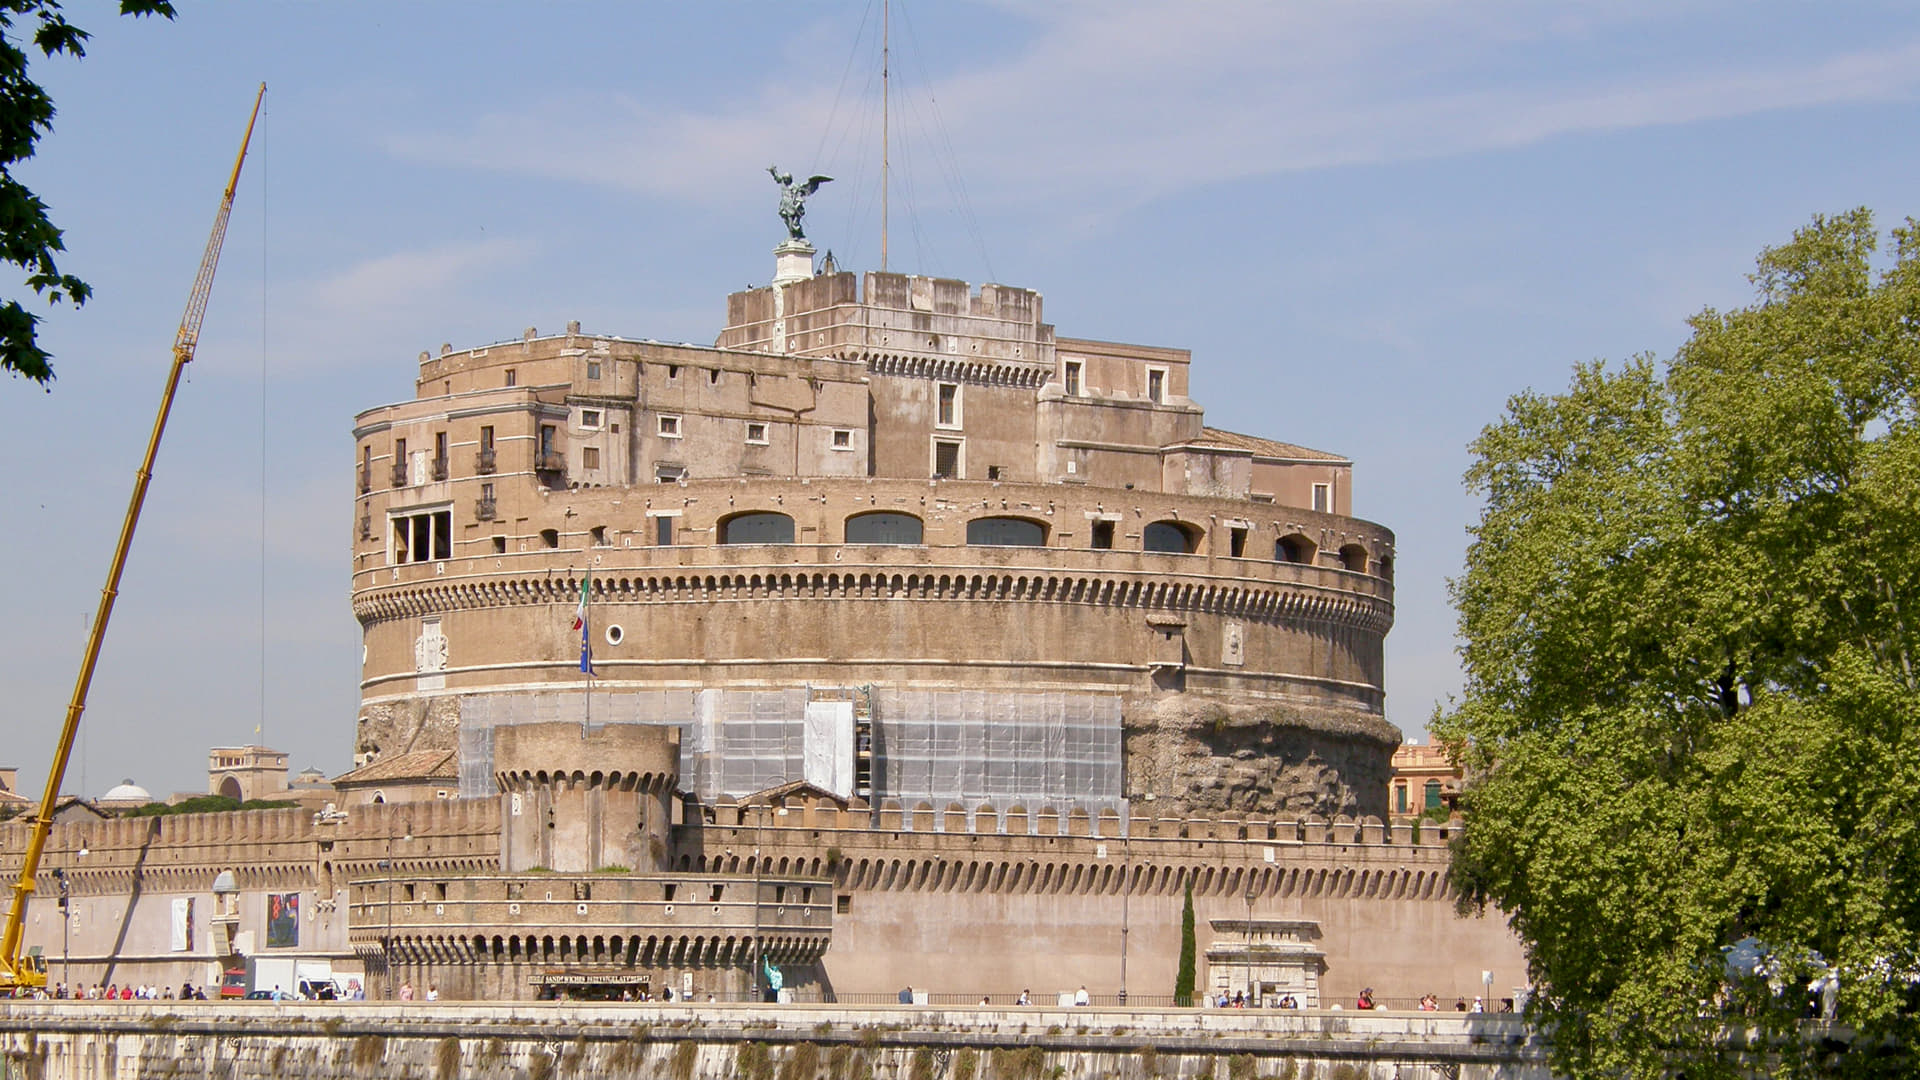
The Castel Sant' Angelo from the Southeast
The squat bulk of the Castel looms over the north bank of the Tiber river. Visitors enjoy an excellent view of the complex from several points on the on the opposite bank for the river, to the south.
This shot depicts the Castel as seen from the southeast. From this angle, it’s relatively easy to gain a sense of how the renaissance-era elements of the Castel sit on top of the main drum of Hadrian’s original ancient Roman monument. If you look above the curtain wall, and just to the right of the modern screening that had been set up to protect some renovations that were in progress when we took this picture, you can see the worn stones that define the body of the drum. These end just below the first of the visible horizontal bands that define the lower edge of the renaissance brickwork. In Hadrian’s day, the earthen mound and its cypress trees stood just on top of those stones (which, of course, were faced with white marble).
The papal residences are built around the original Roman tower that supported Hadrian’s statue. You can still clearly see where that tower once stood: it’s the squared bit of the residence that stands slightly taller than everything else, now supporting a bronze statue of the Archangel Michael on its south edge.
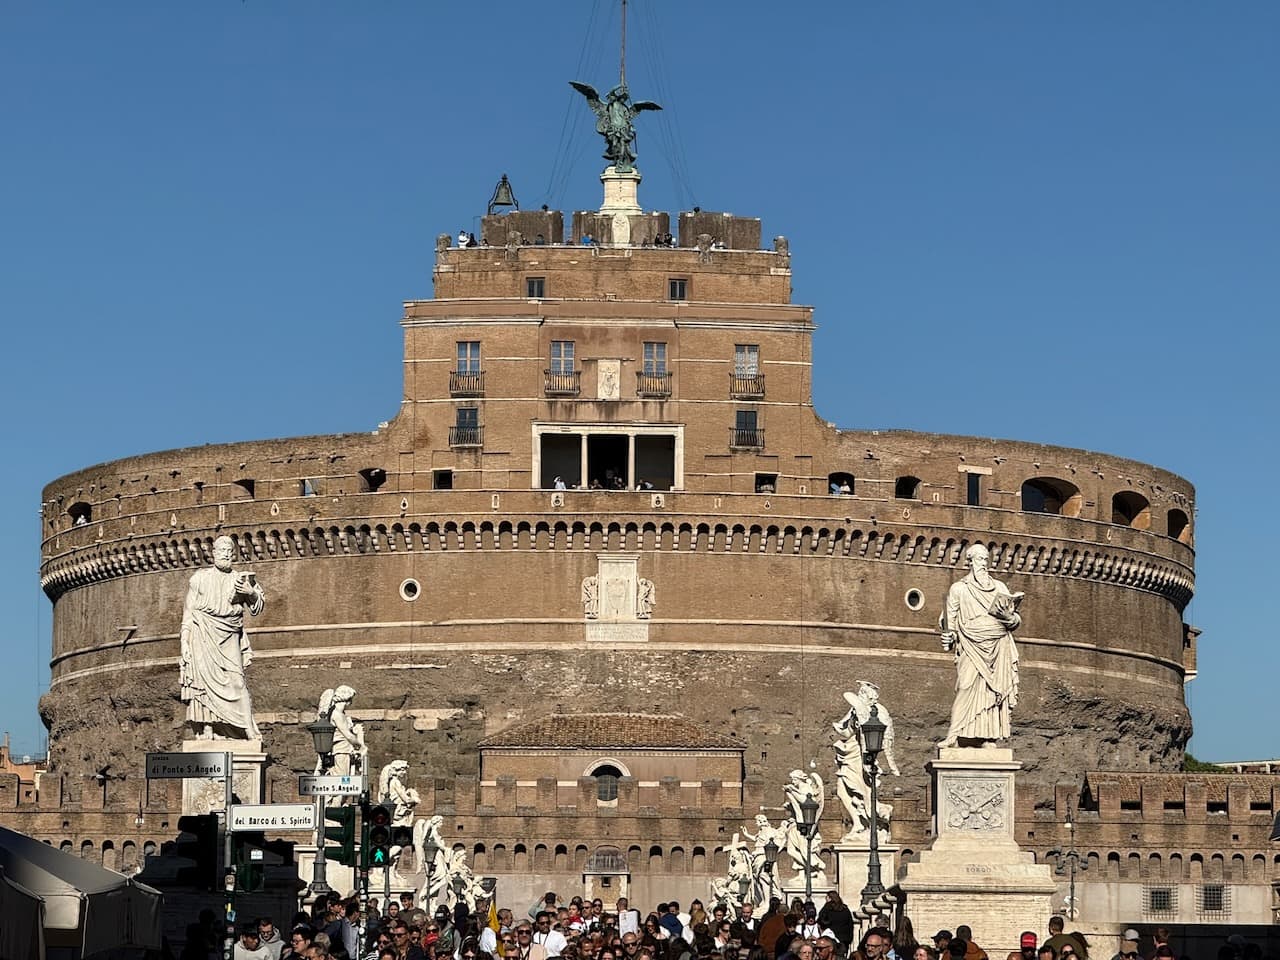
The Castel Sant' Angelo—The Approach from the South across the Ponte Sant' Angelo
The traditional approach to the Castel leads visitors from south to north across the Ponte Sant’ Angelo. The ten angels that stand on this bridge’s balustrade were carved in the late 17th century. Two were the work of Bernini (although his originals are now kept elsewhere); the rest were carved by other sculptors when Bernini was unable to complete the commission.
From this angle, it is clear that the bulk of the papal residence spans from the north rim of the drum to its south rim, but does not occupy the entire width of the structure on its in the east-west axis; instead (as we’ll see in a bit), the central structure of the residence is flanked by two courtyards.
The open space framed in white marble that sits between the two coats of arms on the central structure of the papal residence is the Loggia of Julius II (pope from 1503-1513), which offers fine views from the monument of Rome to the south. The coats of arms themselves are those of Julius II and his predecessor, Alexander VI.
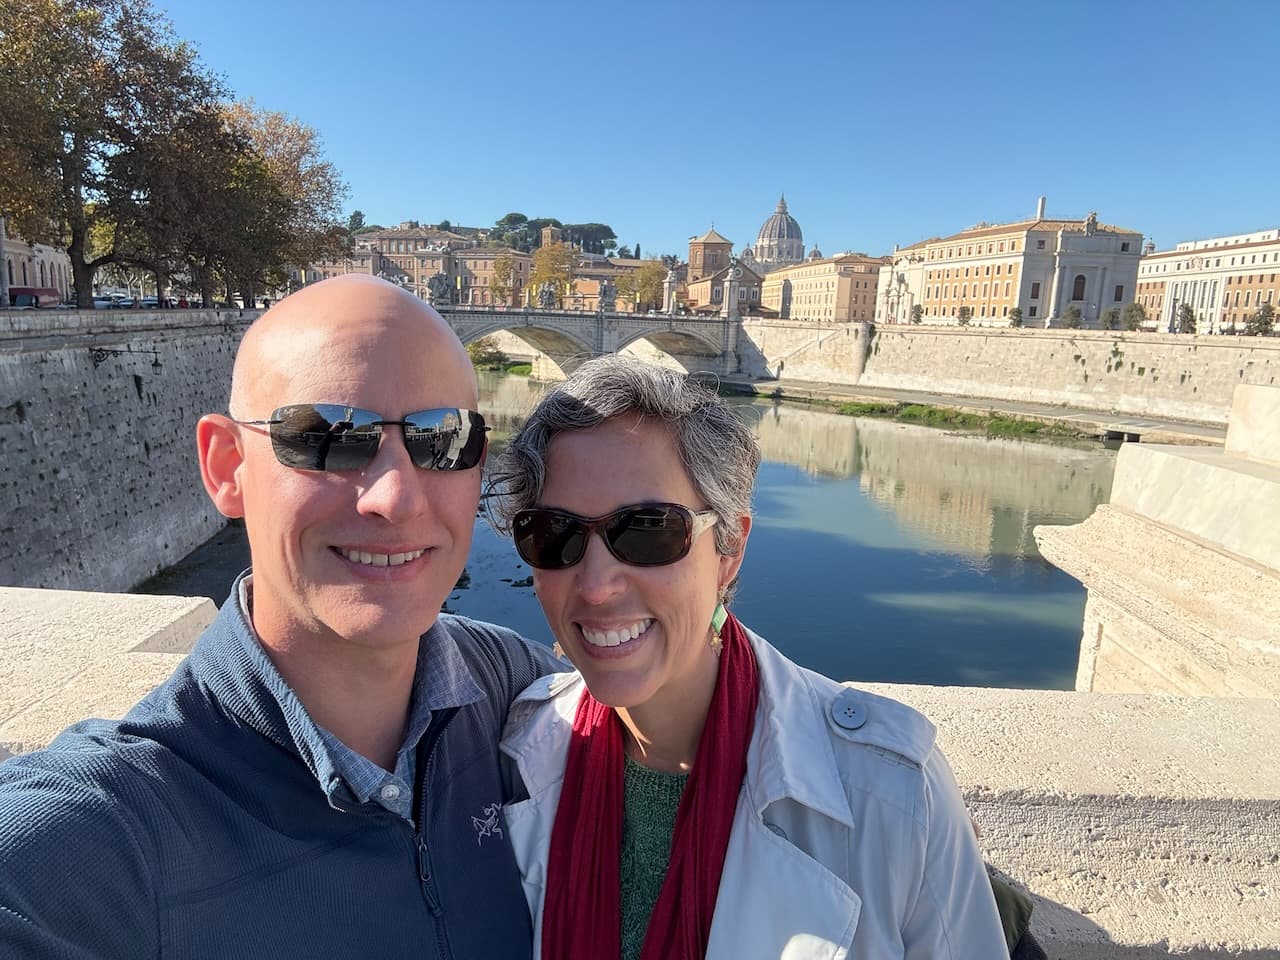
Looking West on the Ponte Sant' Angelo
The Ponte Sant’ Angelo itself is a lively thoroughfare, which is often lined these days with street-sellers and artists. And, of course, between those sculptures of angels, one can find some truly stunning views of the river and of Rome. This selfie features yours truly in the foreground, and in the background you can see the Tiber River, the Ponte Vittorio Emanuele II, and of course the Vatican, with the dome of St. Peter’s Cathedral peeking up in the top right quadrant.
Although the balustrades and statuary on the Ponte Sant’ Angelo are of (relatively) recent vintage, the bridge’s foundations and its three main arches are Roman. They were part of the bridge Hadrian built to connect his monument with the city of Roma proper, the Pons Aelia. They have been supporting the movement of people across the Tiber for almost 1900 years.
The Dromos
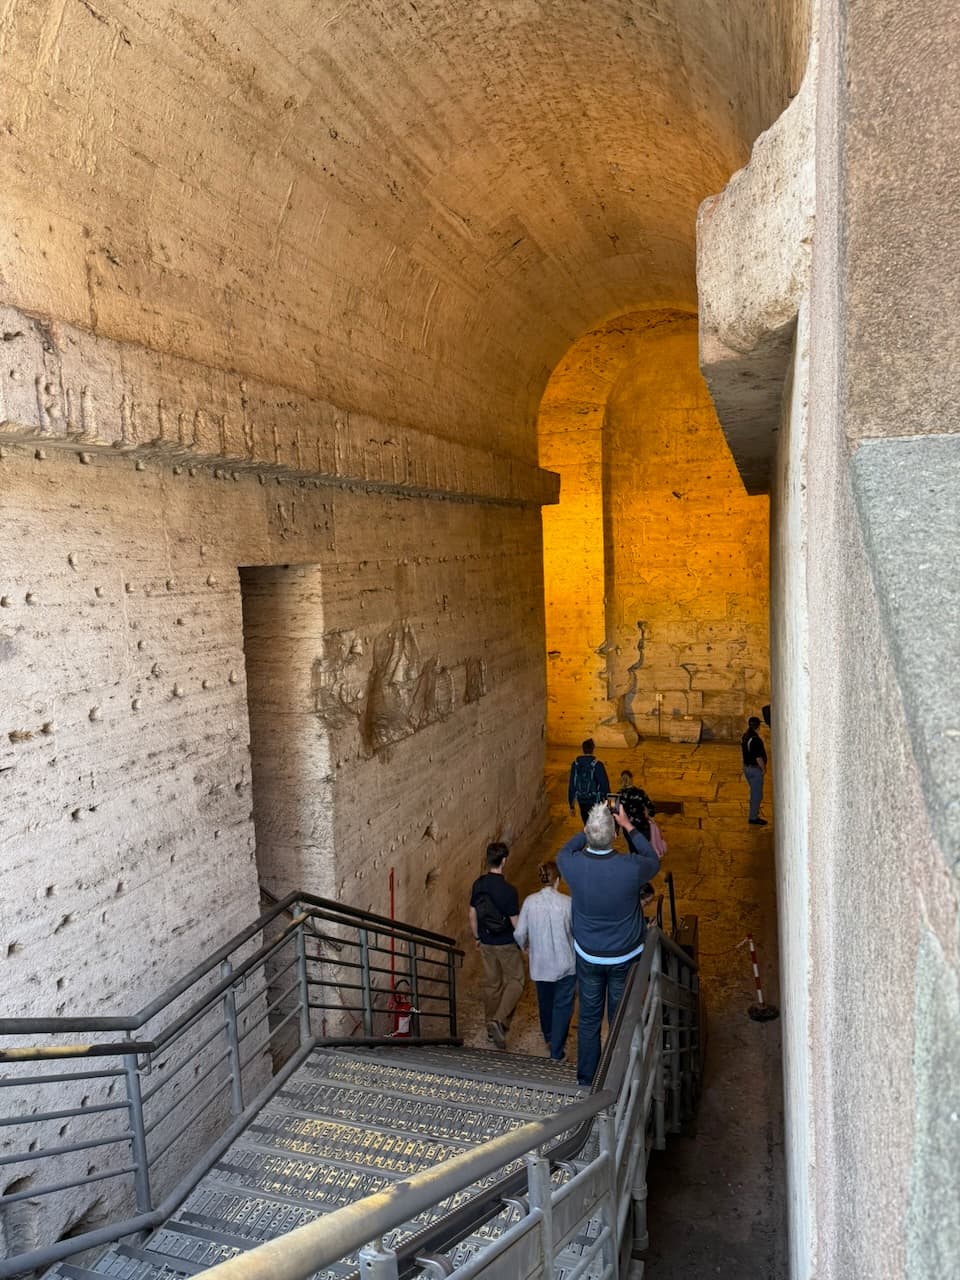
Once visitors pass through the Castel’s curtain wall (which runs along the same line as the original “basement” of Hadrian’s monument), they enter the central drum of the ancient mausoleum by way of Hadrian’s ancient monumental hallway, the dromos. (The stairs are necessary because the level of the courtyard within the Castel’s walls is substantially higher than the ancient ground level; the opening on the left beside the staircase is recent, and it gives access to a ramp.)
Impressive as the dromos is today, it is nevertheless a pale reflection of its former self. The vaulting and the travertine blocks that line the walls are, of course, spectacular, but in antiquity the walls would have been revetted with marble; the squarish holes you can see in the blocks housed metal clamps that supported the marble veneers. (Surviving fragments suggest that these veneers were of a fine, yellow marble from Numidia.) Finally, the niche visible at the end of this section of the dromos was once home to a colossal statue of Hadrian.
Hadrian's Helical Ramp
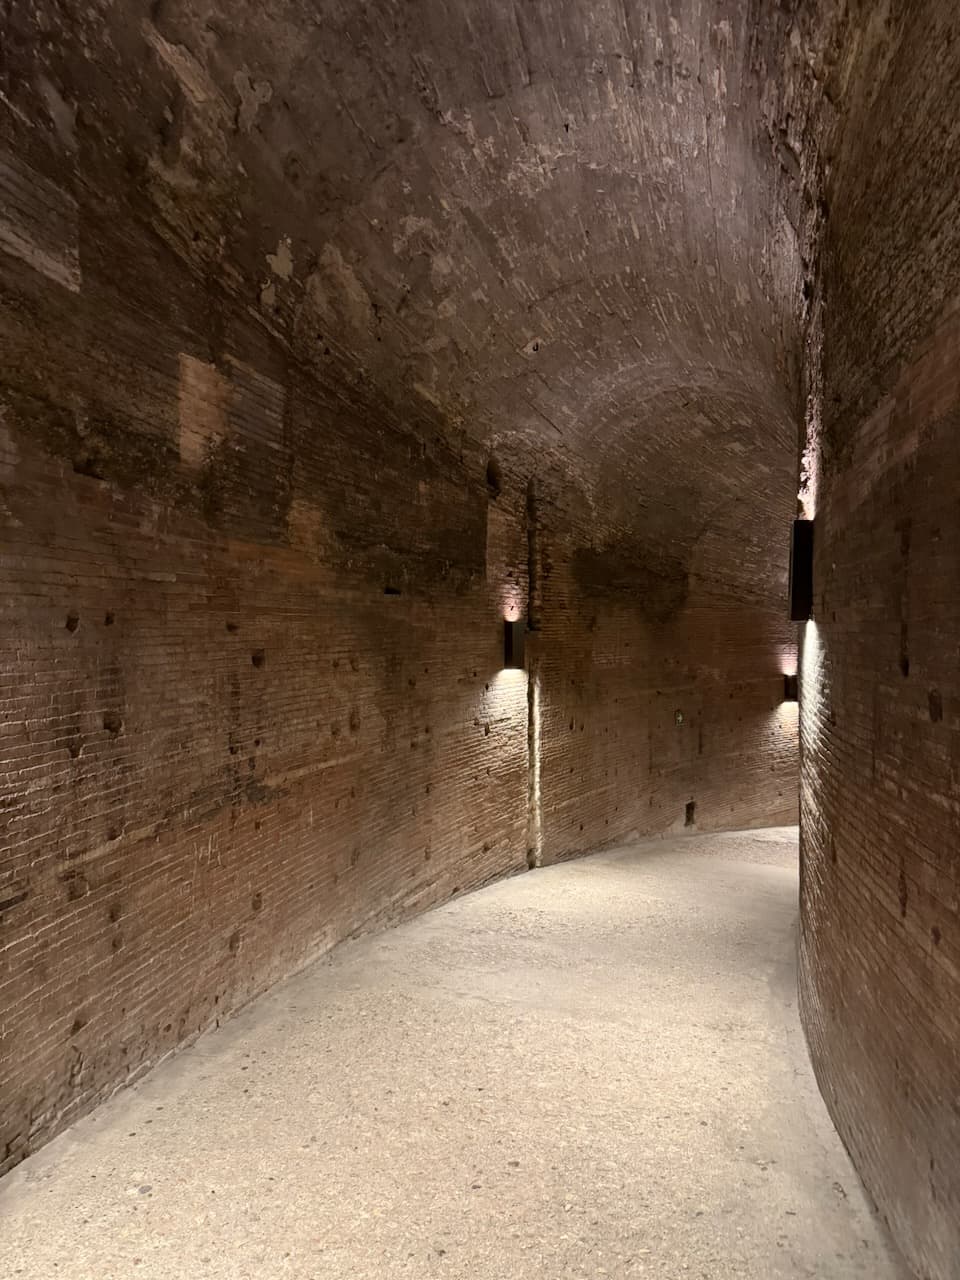
At the end of the dromos, a wide helical ramp opens to the right. This is the original ramp created by the Roman builders to give access to the upper levels of the monument. At present, it is open only for one turn around the drum’s entire internal circumference—enough to bring visitors up to the Hall of Urns (next photo).
In this shot (looking back toward the dromos), you can make out traces of the original mosaic flooring. The brickwork on the walls, spectacular though it is, was not meant to be seen: like the travertine blocks in the dromos, these walls would have carried marble veneers (note the anchor holes).
Four shafts pierce the ceiling on the way up; situated at the points of the compass, they allowed light and air into the corridor.
The Hall of Urns
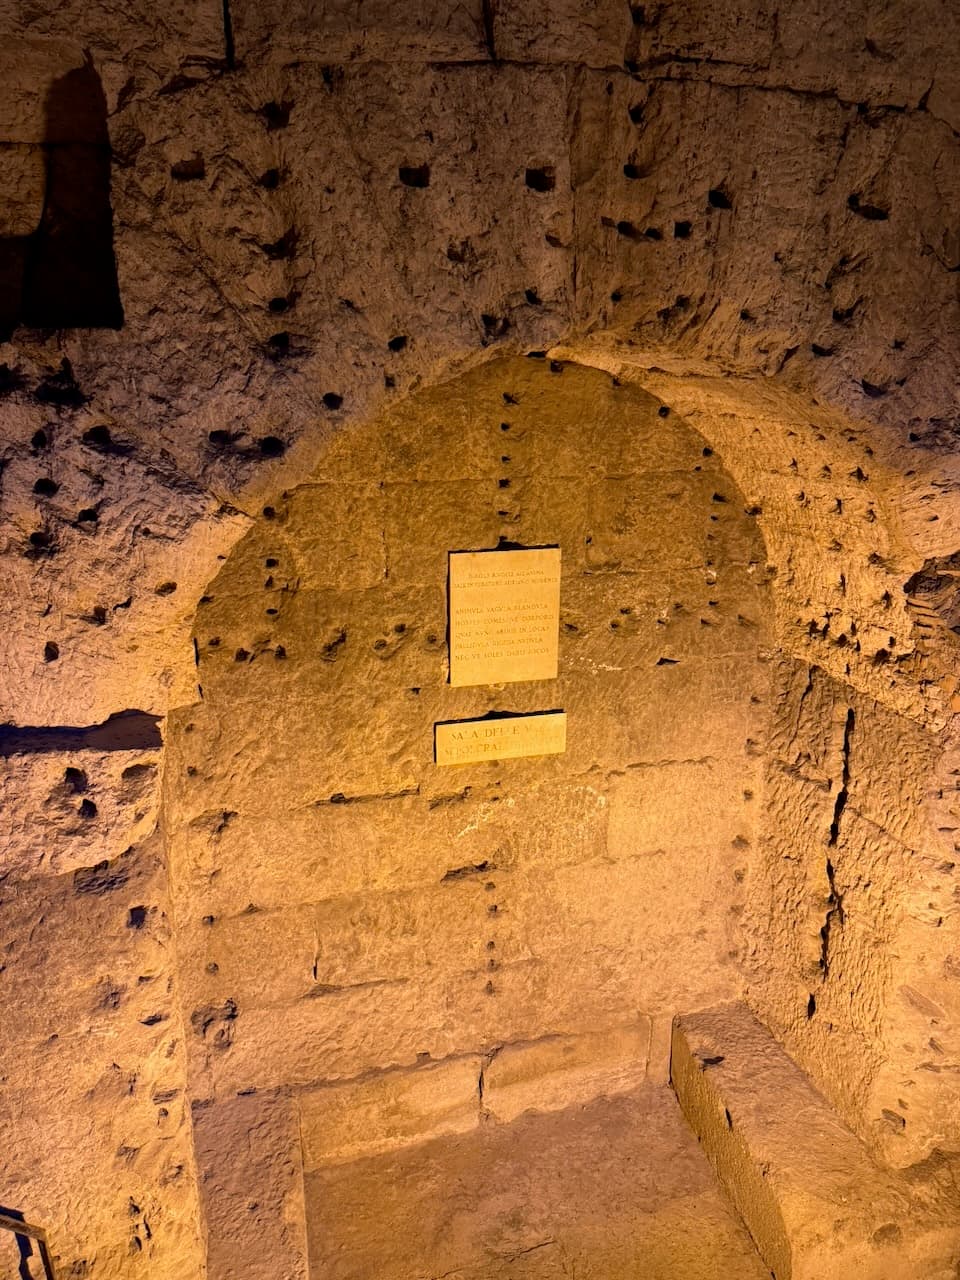
In antiquity, the helical ramp intersected with a corridor aligned on a north-south axis, which brought visitors into the central chamber within the mausoleum’s main drum. Now known as the Hall of Urns, this is a high, vaulted room with three arched niches (one in each of the west, east, and north walls; the south wall is where the corridor enters the chamber). Once upon a time, this room too would have been decorated lavishly; the telltale sign, once again, is the presence of anchor points for marble veneers all over the visible blocks.
This room was almost certainly the main burial chamber of the mausoleum. It would have contained the sarcophagi and/or urns that contained the cremated remains of most members of the imperial family, from Hadrian to Caracalla. It is generally thought that the three niches were built to house the remains of Hadrian, his wife Sabina, and his adopted son and heir Lucius Aelius (who, unfortunately, preceded the emperor in death). There are, however, scholars who believe that Hadrian’s ashes were in fact housed above, in a room in the central tower that rose from the top of the drum.
The Vatican Museum preserves an ancient sarcophagus lid that probably came from this chamber. Made of red porphyry, it was clearly sculpted for a member of the imperial family. It (along with the rest of the sarcophagus, which is now lost) was repurposed as a tomb for the Holy Roman Emperor Otto II in the late tenth century; although the body of the sarcophagus was destroyed later in a fire, the lid was then used as the basin of a baptismal font.
The (modern) plaque on the wall of the western niche reproduces the Latin text of a poem attributed to Hadrian in an ancient biography of the emperor. Hadrian is said to have written it as he lay dying at Baiae in July, 138 (Historia Augusta, Hadrian 25.9; translated by Anthony R. Birley in “Hadrian: The Restless Emperor”).
“Little soul, little wanderer, little charmer,
Body’s guest and companion,
To what places will you set out for now?
To darkling, cold and gloomy ones—
And you won’t make your usual jokes.”
animula vagula blandula,
hospes comesque corporis,
quo nunc abibis? in loca
pallidula rigida nubila—
nec ut soles dabis iocos.
The Angel's Courtyard
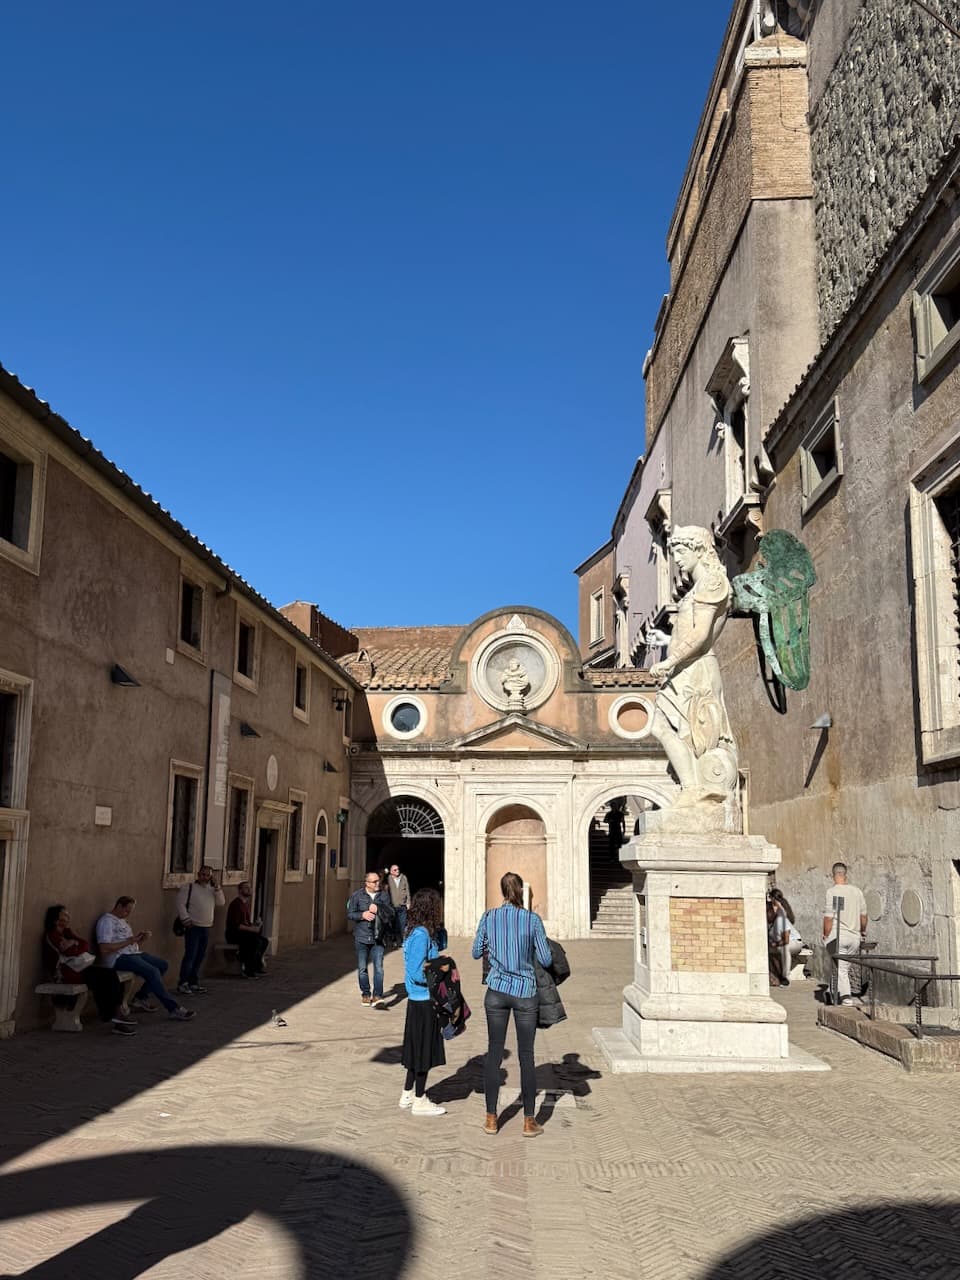
Although the helical corridor continues up through the drum, its higher reaches have been closed off for centuries. Instead, visitors ascend higher on a modern, inclined bridge that crosses the Hall of Urns (completely ruining the grandeur of the space) and leads to a medieval/renaissance tunnel housing a staircase that emerges here, in the Angel’s Courtyard (from the darkened doorway on the left at the end of the shot, to be precise). The courtyard takes its name from the statue of Archangel Michael that you see here. Crafted in 1544 by Raffaello da Montelupo, a pupil of Michelangelo, it was the fifth statue of Michael to grace the top of the monument (and was replaced by an all-bronze statue in 1753).
We can only describe our reaction as we emerged from the staircase as “awestruck.” The transition from stately burial chamber to courtyard in a renaissance palazzo is incredibly dislocating, not least because of the sheer size of this complex, plopped down as it is on top of an ancient tomb. To the left is the armory, built on top of the external western rim of the drum; to the right is the complex housing the papal apartments, which stretch from the drum’s northern to southern rim, and now encase the ancient Roman tower that projected from the drum’s top.
In antiquity, of course, this space probably would have been covered with an earthen tumulus, which (we think) supported the hanging garden of cypress trees.
The Chapel of Leo X
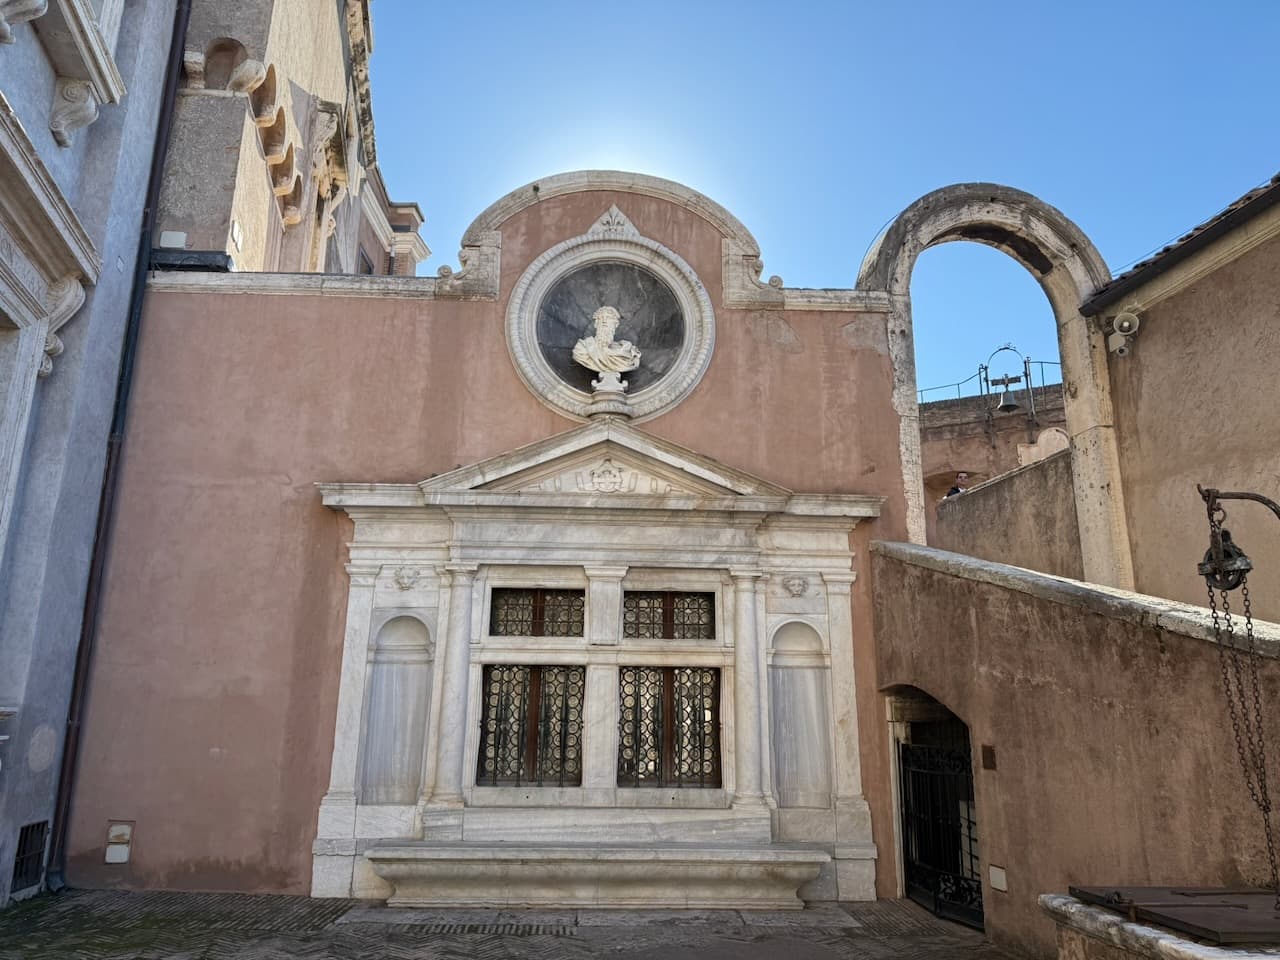
On the south wall of the courtyard stands the facade of a chapel built for Leo X, which is unfortunately not generally open to the public. It is, in fact, the work of Michelangelo, who designed it as a private chapel for Leo sometime in the second decade of the sixteenth century.
The Apollo Room and its Fireplace
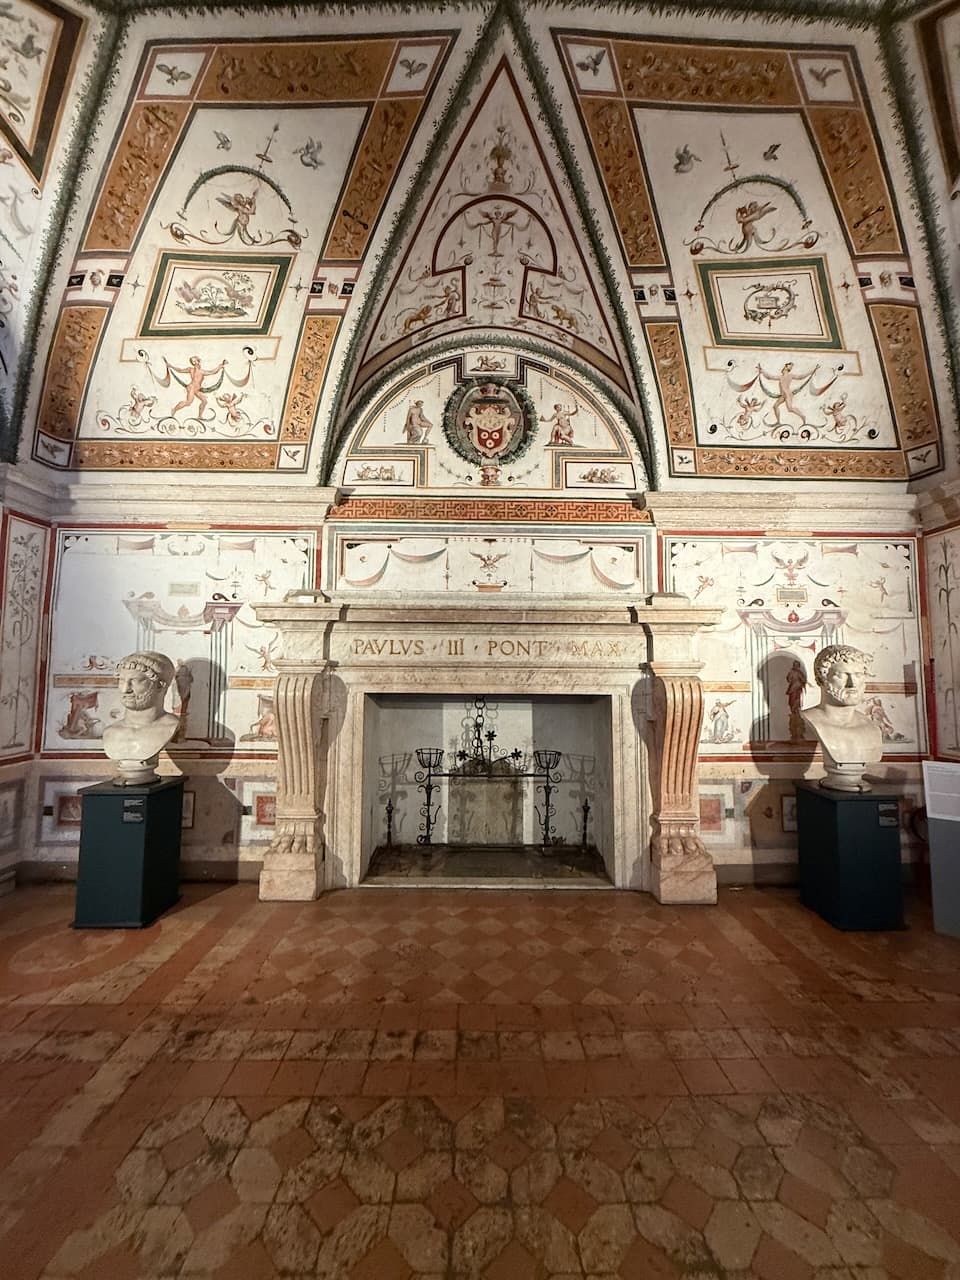
The popes responsible for building and decorating the papal residences in the 15th and 16th centuries loved their luxuries, and that shows in the decoration of many of the complex’s rooms. This room, the Apollo Room, was originally laid out by Nicholas V in the middle of the 15th century, but its current decorative scheme was commissioned a century later by Paul III (and we’ll have more to say about him later). Here, on the south wall of the room, a fireplace in the mannerist style is engraved with his Paul III’s name.
Alas, we don’t have closeup shots of the labels beneath the two busts flanking the fireplace, but at a glance, we’d guess that the one on the left is Hadrian, and the one on the right is Antoninus Pius (the beards make it hard to tell the members of the Antonine dynasty apart!).
The Apollo Room and its Great Tondo
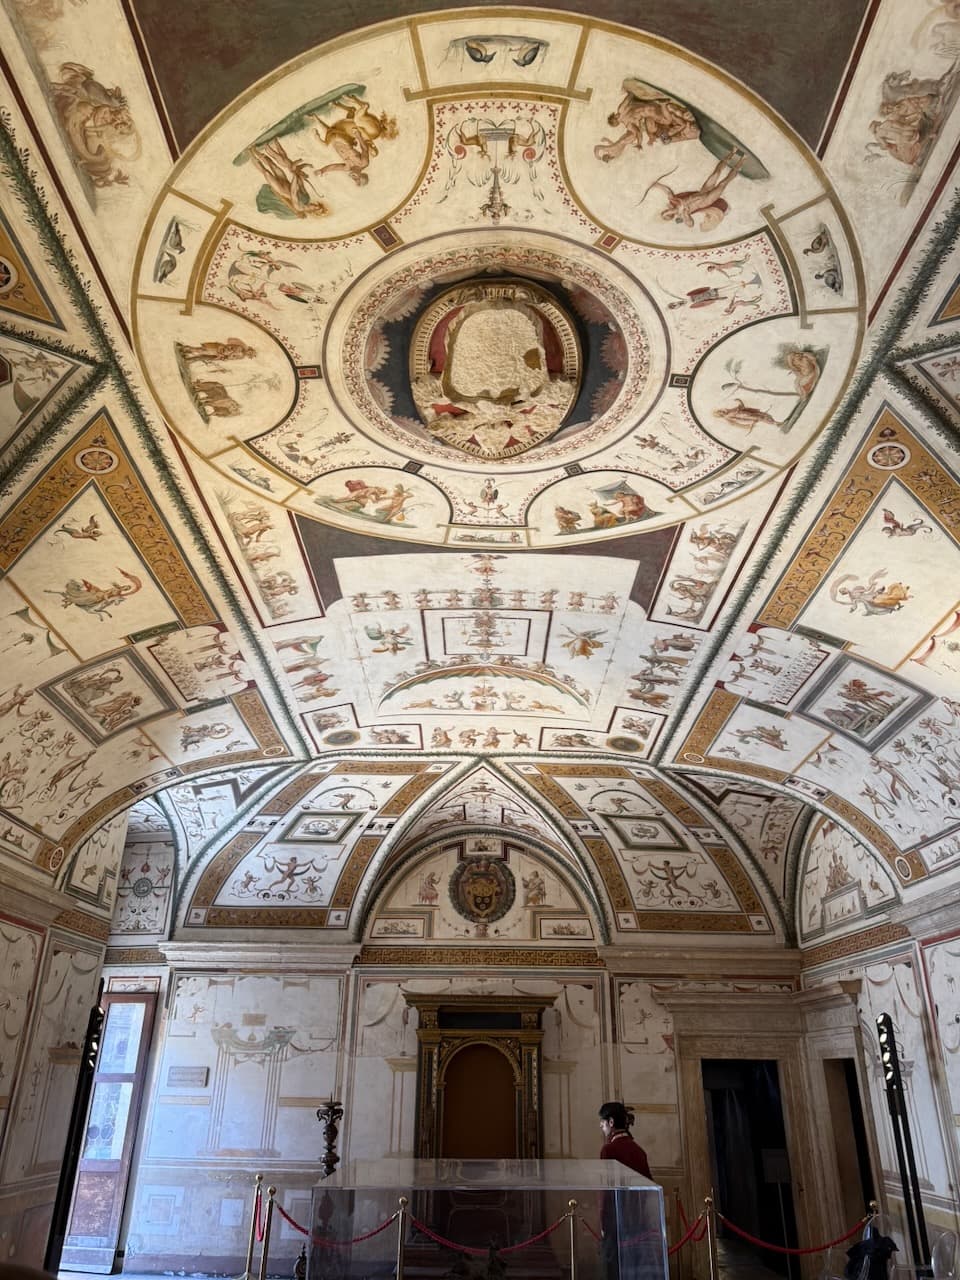
The magnificent ceiling of the Apollo Room is dominated by a tondo displaying scenes from six myths about the room’s namesake, the god Apollo. The nearest of the two lunettes, for instance, show Apollo entrusting his son Asklepios to the centaur Chiron (left), and Apollo killing the Cyclopes after Asklepios is struck down by a thunderbolt (which the Cyclopes forged for Zeus).
Paul III originally gave the commission for the room’s frescoes to Perin del Vaga, a frequent collaborator of Raphael’s. Apparently, he died only a few weeks into the project, which was then taken over by two younger men: Domenico Zaga, and Pellegrino Tibaldi. We’re told that the frescoes have inconsistencies of style as a result of the Vaga’s death, but we don’t know nearly enough about 16th-century fresco art to spot them!
Our tour of the Castel Sant' Angelo continues in our next post, Hadrian's Mausoleum and the Castel Sant' Angelo, Part II!.